A cornerstone in any VMware admin’s toolkit is Powercli, containing over 600 cmdlets for managing and automating your VMware estates.
Brief History
The original release was just over 10 years ago and was originally called VMware Infrastructure Toolkit (for Windows) with a measly 8 cmdlets. Jump forward to 2009, a change of name to ‘VMware vSphere PowerCLI’ and an increase in cmdlet count to 163. Now in 2017, with another new name , VMware PowerCLI 6.5.3 has over 600 cmdlets.
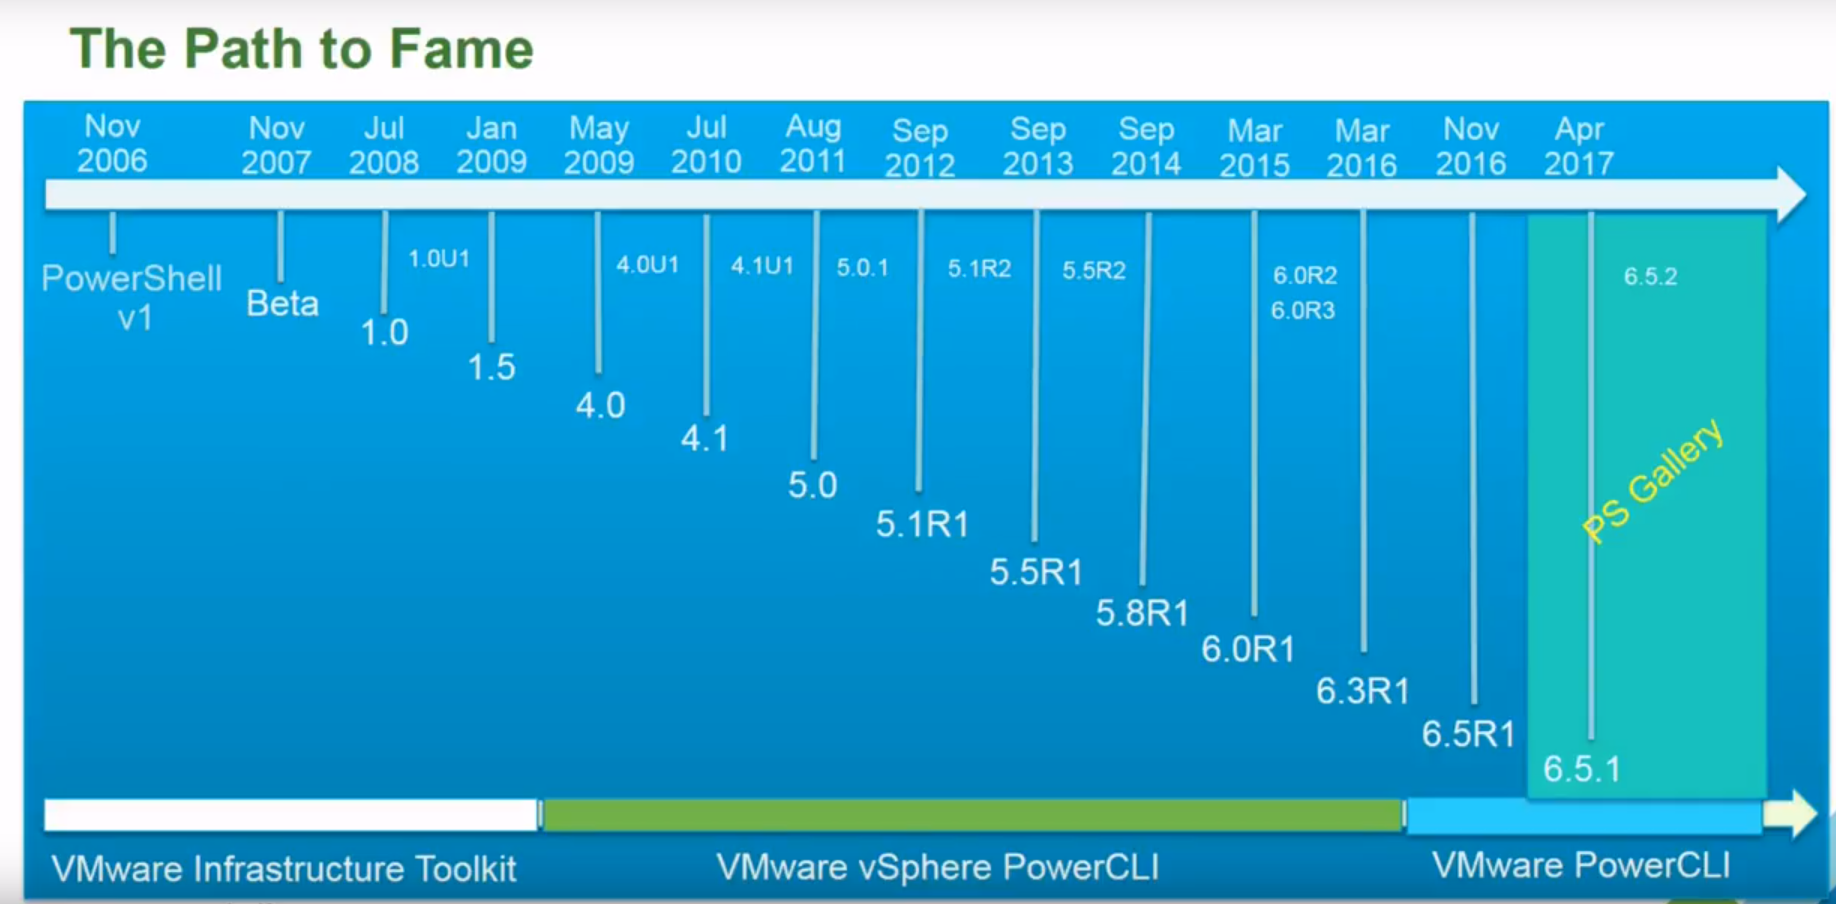
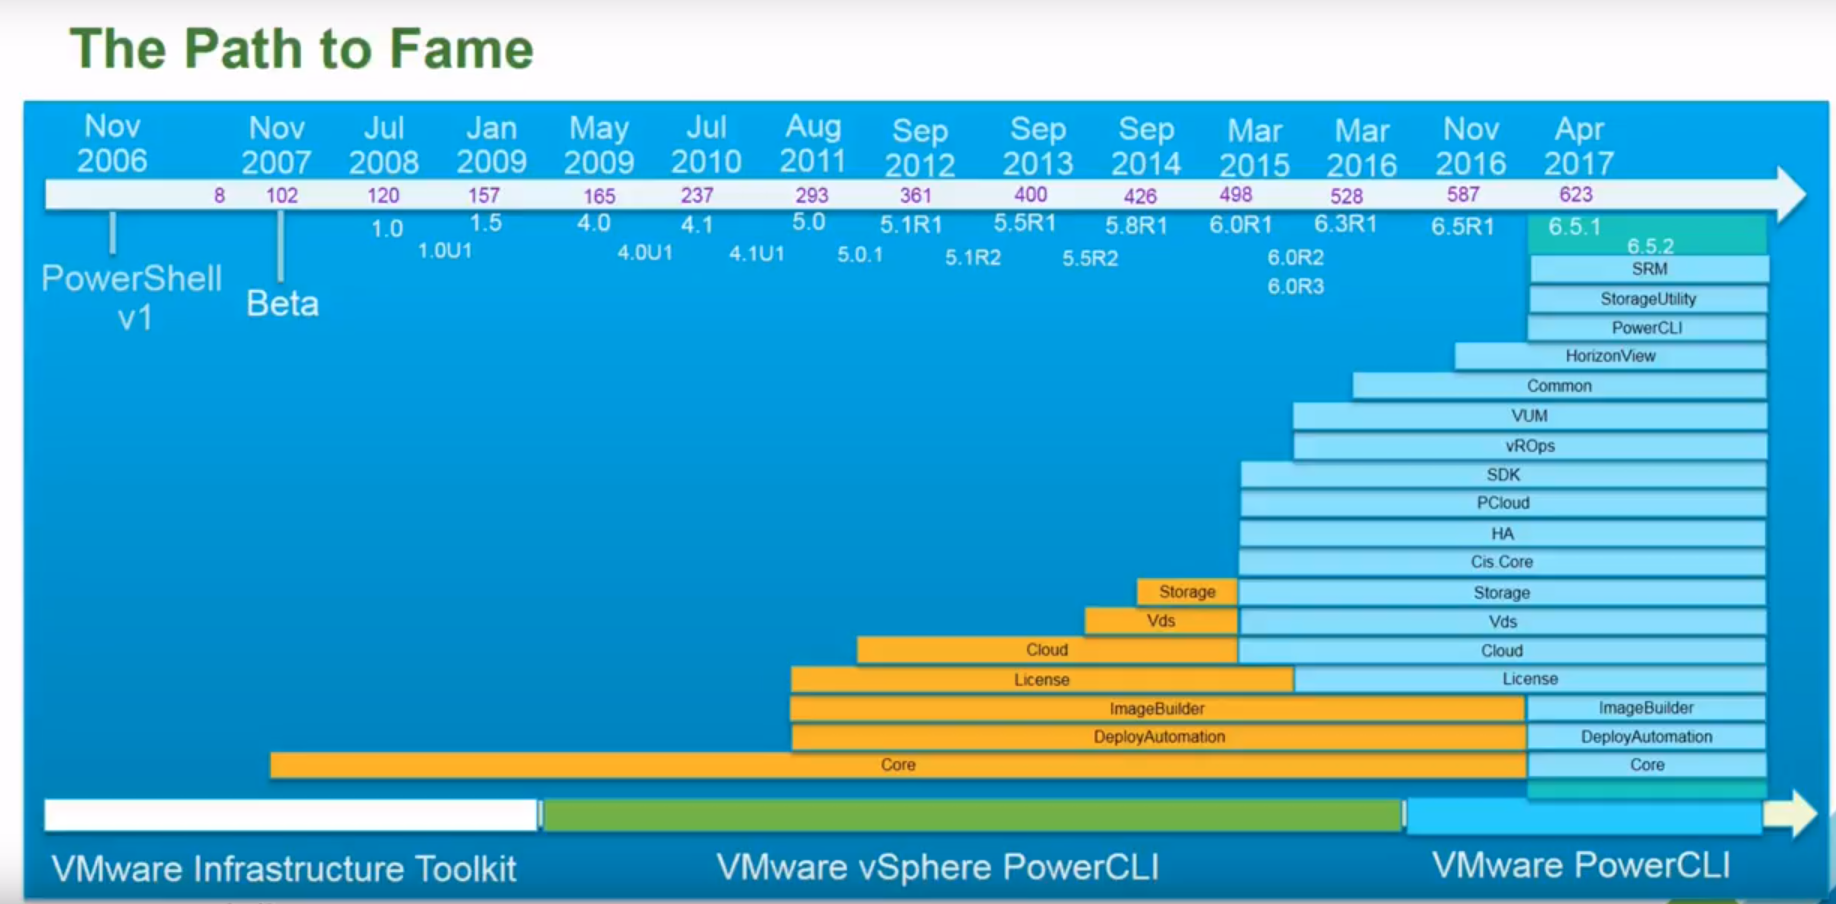
You can watch the VMwworld 2017 session ‘vSphere PowerCLI 10th Birthday Edition’ over here https://youtu.be/EYAl8IBcews
Back in the days of VMware vSphere PowerCLI installation was via an installer package and your scripts relied on snap-ins distribute the cmdlets, to use in the scripts. It was common place to see at start of scripts the following :-
Add-PSSnapin “VMware.VimAutomation.Core”
Goodbye Snap-Ins, Hello Modules
When PowerCLI 6.0 was released the distribution model for the cmdlets changed from snap-in to Modules. https://blogs.vmware.com/PowerCLI/2015/03/powercli-6-0-introducing-powercli-modules.html . This provides a more lightweight way to make the cmdlets available for consumption.
Goodbye installer, Hello PowerShell Gallery
With the release of PowerCLI 6.5.1 earlier this year, the distribution model for the installation of VMware.PowerCLI modules changed. No longer was there a reliance on an installer, instead users could install the modules direct from the PowerShell Gallery. https://www.powershellgallery.com/packages/VMware.PowerCLI
Installing VMware PowerCLI
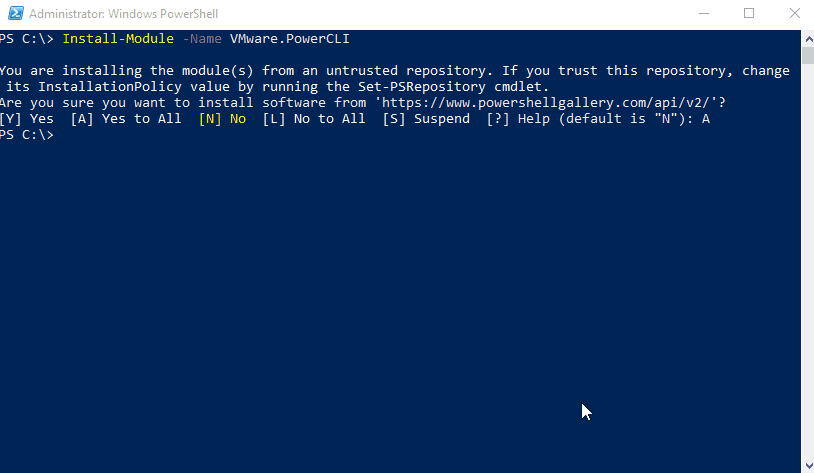
Using just short line of code is all it takes to install the module
(*NB the computer you are installing the module onto must have internet connectivity and the PowerShell session must be run as administrator)
Install-Module -Name VMware.PowerCLI
If you receive a warming message “You are installing the module(s) form an untrusted repostitory” you can set the powershell gallery as a truster repository with the command :-
Set-PSRepository -Name PSGallery -InstallationPolicy Trusted
To verify the module has successfully installed run
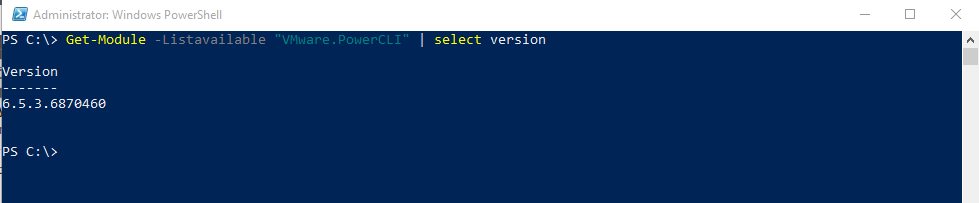
Get-Module -Listavailable “VMware.PowerCLI”
Or if you want to just list the version number installed then
Get-Module -Listavailable “VMware.PowerCLI” | select version
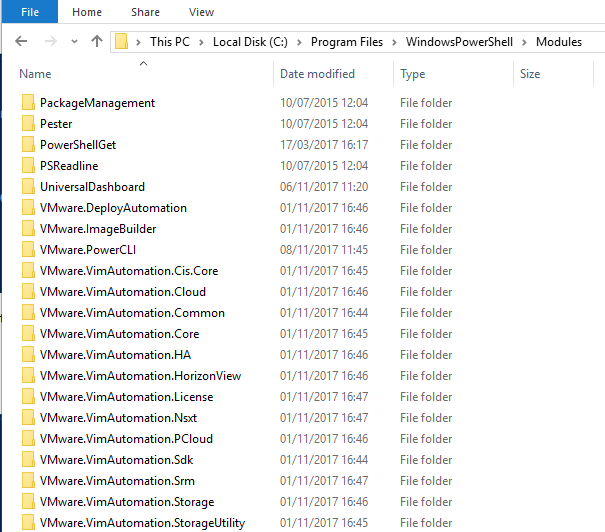
The module files themselves can be found in
C:\Program Files\WindowsPowerShell\Modules
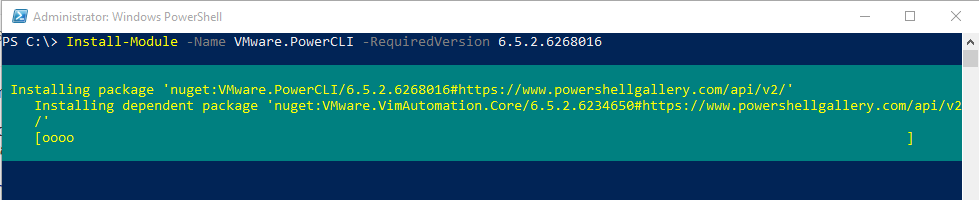
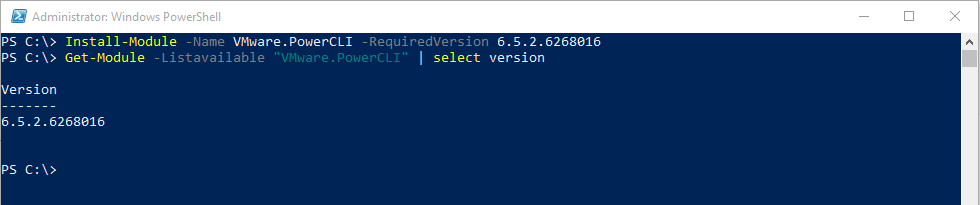
If for some reason you need to install a specific version of the module you can use the command
Install-Module -Name VMware.PowerCLI -RequiredVersion
In the following screenshot I am installing version 6.5.2.6268016
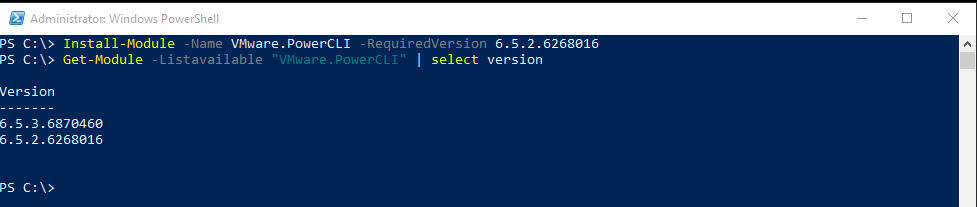
Verifying I now have 2 versions of the module installed
Updating VMware PowerCLI
Yip you guessed it another 1 liner to update the module to the latest version.
Update-Module -Name VMware.PowerCLI
In the example I have version 6.5.2.6268016 installed
Updating to latest version
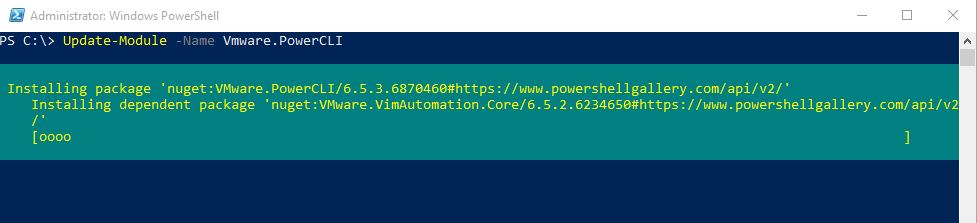
Confirming newer version has been installed

Point worth noting is that the Update-Module cmdlet will *not* remove the older version of the module. There have been requests to implement a feature to do this https://github.com/PowerShell/PowerShellGet/issues/130
Uninstalling VMware PowerCLI
As with the install the uninstall is just a single line of code
Uninstall-Module -Name VMware.PowerCLI

*NB if you have multiple versions of the module installed this command will remove the most recent version.
If you want to uninstall a specific version then use the -RequiredVersion option
Uninstall-Module -Name VMware.PowerCLI -RequiredVersion 6.5.2.6268016

There you have it folks installing,updating and removing the VMware PowerCLI modules is a very straight forward process, made all the more simplier by using the PowerShell gallery.
One comment
Comments are closed.